
I had so many plans for the last week of term, I was going to be super organised and make some last minute Christmas presents as well as work on my C&G and update the blog with that tutorial I promised. Unfortunately my youngest was ill all week so I am far from organised. In desperation I had to drag the poor fella around town on Friday, although I did keep him happy by popping into a cafe for a giant chocolate muffin and hot chocolate.
The tutorial was for some festive napkin rings I made last year, I haven't had time to take step by step photos but it's a fairly easy project so I'll just explain how they are made.
- Make some flat felt in green (or use commercial felt if like me you find yourself short of time).
- Using a bright red wool make a some little felt beads. For those of you who haven't made felt beads before Liz from Mill Girl has a great tutorial here.
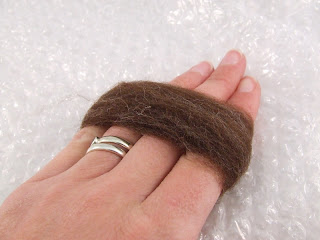
- Take a small length of brown roving (I'm using natural merino), and wrap it around your fingers.
- Dip it in warm soapy water (make sure you're not too heavy handed on the soap as too many suds is a disaster with this technique), and start to roll the felt on some bubble warp. (There is no soap in the picture below because this is a fake step by step photo).
- Keep moving the roving around your fingers and rubbing it on the bubble wrap.
- Once it has started to felt you can take it off your 4 fingers and just use 2, either continuing to rub it on the bubble wrap or rubbing it on the palm of your hand.
- When felted rinse in cold water and leave to dry.
- Cut out your holly shaped leaves and when everything is dry sew the leaves and berries onto the ring and hey presto, you have a festive napkin ring!


.JPG)


.JPG)
.JPG)
.JPG)

.JPG)
.JPG)
.JPG)

.JPG)

.JPG)


.JPG)
.JPG)
.JPG)

.JPG)
.JPG)


.JPG)
.JPG)


.JPG)